


.jpg)
The wiring of the solar panel is also known as stringing. Now the question arises of how to wire solar panels together. This is a fundamental topic for any solar installer, and this solar panel wiring guide will walk you through the basics.
It’s important to understand how different solar panel configuration methods impact the voltage, current, and power of a solar array. The user of the solar panel requires an appropriate inverter for the array and needs to make sure that the system will function effectively.
It is considered that if the voltage of your array exceeds the inverter’s maximum, production will be limited by what the inverter can output. The production is totally dependent on the extent the inverter’s lifetime may be reduced.
If the array voltage is too low for the inverter, the system will also produce less production of energy because the inverter will not operate until its “start voltage” has been reached.
There are multiple ways to approach solar panel wiring. One major way to understand the differences is by stringing solar panels in series versus stringing them in parallel. These different kinds of stringing configurations have different effects on the electrical current and voltage in the circuit.

Stringing solar panels in series is inclusive of connecting each panel to the next in a line.
Just like a typical battery, solar panels have positive and negative terminals. While connecting the stringing in series, the wire from the positive terminal of one solar panel is connected to the negative terminal of the next panel.
When stringing panels are interconnected in series, each additional panel adds to the total voltage (V) of the string, but the current (I) in the string remains the same.
One drawback to stringing in series is that a shaded panel can decrease the current through the entire string.
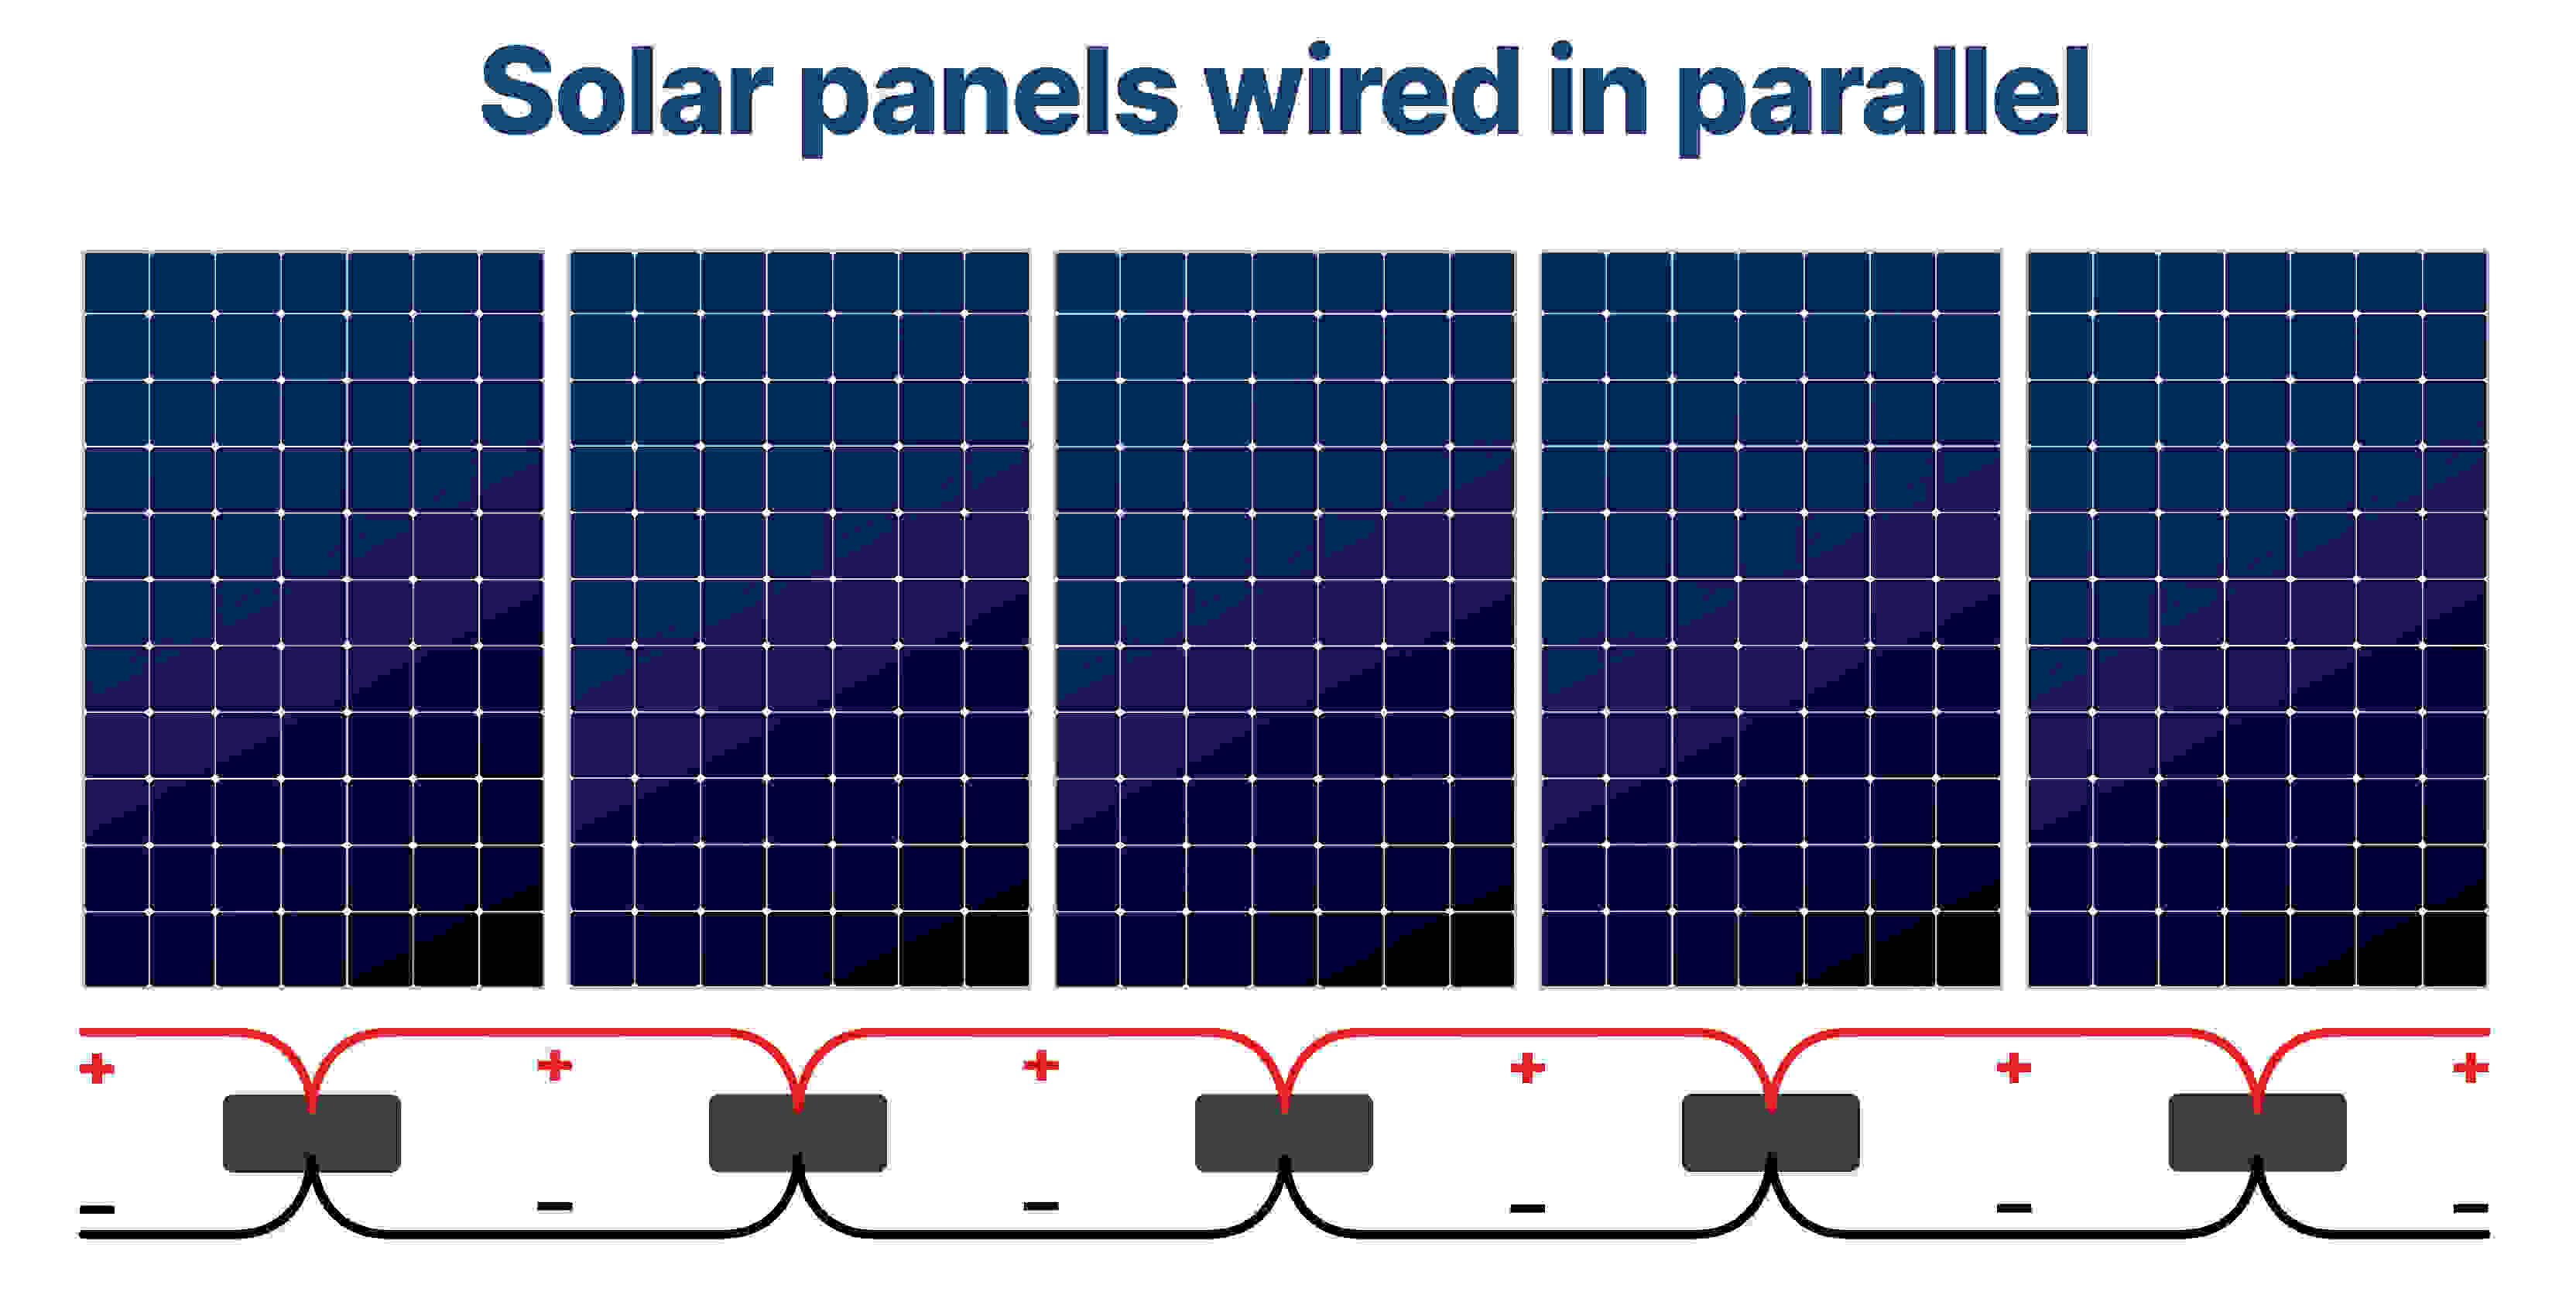
Stringing solar panels in parallel is a bit different. Instead of connecting positive to negative, the positive terminals of all the panels on the string are connected to one wire, and the negative terminals are all connected to another wire.
In this situation, each additional panel increases the current (amperage) of the circuit. However, the voltage of the circuit remains the same.
A benefit of parallel wiring is that if one panel is heavily shaded, the rest of the panels can operate normally.
Based on the solar panel configuration—whether in series or parallel—it’s reasonable for your solar energy clients to conclude that solar panels in series are best for installations that receive some shade, while parallel wiring is better suited when shading isn’t a problem. This is a core principle of any solar panel wiring guide.
There are also some additional factors worth considering when learning how to wire solar panels:
Every inverter has its own voltage range. For maximum power generation, it’s critical that the PV panels and electrical wiring lie within the inverter’s spectrum:
MPPT stands for Maximum Power Point Tracking, a modern inverter technology that optimizes PV output as conditions change. It works by monitoring the system to help the inverter balance voltage and current for maximum energy generation.
By tracking this sweet spot in real-time, inverters with MPPT technology allow systems to generate more clean energy than older inverter models.
The utilization of wiring configuration depends on the PV system design. The layout and solar wiring diagram should be calculated carefully, since wiring directly impacts efficiency and savings.
Today, solar professionals don’t need to guess how to connect solar panels or how to hook up solar panels. Modern solar design software can simulate different solar panel configurations, crunch numbers for energy production, and generate monthly savings reports along with 3D renderings in just a few clicks.
Before diving into a solar panel wiring guide or learning how to wire solar panels, it’s important to understand the key electrical terms. These include voltage, current, and power—all of which are closely connected and critical for safe and efficient electrical wiring for solar panels.
Let’s break them down:
Voltage, also called electromotive force, defines the charge difference between two points in an electrical circuit.
When it comes to solar panel configuration, voltage is directly influenced by the amount of sunlight falling on the panels—the more sunlight, the higher the voltage and energy output.
Current is the flow of charge (free electrons) in a circuit and is measured in amperes (amps). In the context of how to connect solar panels, current plays a major role in determining whether panels should be wired in series or parallel.
Electric power can be calculated using the formula:
P = V × I
Where V = Voltage and I = Current.
In simple terms, power represents the rate at which electrical energy flows through a circuit.
The process of wiring solar panels is more straightforward than most people assume. The first step is to determine the type of solar panel configuration you’ll use—series, parallel, or a combination of both.
This decision depends largely on the voltage and amperage limitations of your power inverter, as well as the capabilities of your charge controller. These factors also help protect the batteries you plan to charge with your solar panels.
Once you know the best setup for your system, you can follow the instructions that come with your panels.
For a visual overview, a solar panel wiring diagram or solar panel connection diagram is often the easiest way to understand both methods.
.jpg)
If you’re learning how to hook up solar panels, the process can be broken into four key steps. While it requires attention to safety and accuracy, the overall process is straightforward when you follow the right sequence.
Before connecting solar panels to your home’s wiring, install them securely on the roof. A single panel won’t provide enough energy for your home, so several panels need to be installed and linked together in the right solar panel configuration. This typically involves connecting solar panels in series or parallel, depending on your system design.
Solar panels produce direct current (DC), while your home requires alternating current (AC). To make them compatible, you’ll need a power inverter.
After mounting and stringing the panels, connect them to the inverter. Many systems also integrate a battery to store excess energy, so you can continue using solar power at night or on cloudy days. This step highlights why accurate electrical wiring for solar panels is so important.
Next, connect the inverter (or battery if installed) to your home’s circuit breaker panel. This step distributes solar electricity to different zones of your home. While solar panels can reduce grid reliance, most systems remain connected to the utility grid. Through a process called net metering, any extra energy your panels generate is sent back to the grid, earning you credits and lowering your electricity bill.
Finally, connect the inverter to your home’s fuse box. This enables the inverter to convert DC into AC power, making it usable for household appliances.
While solar energy can greatly offset your utility usage, it may not always cover 100% of your energy needs. That’s why many homeowners also keep backup power options, like generators, in case solar production dips.
%20(1).png)
1. How should solar panels be wired?
Solar panels can be wired in series (positive to negative) to raise voltage or in parallel (positives together, negatives together) to raise current. The right choice depends on your inverter’s voltage range and shading conditions.
2. Can I wire solar panels myself?
Yes, basic electrical wiring for solar panels can be done DIY if you follow safety rules and manufacturer instructions. Still, it’s best to have an electrician connect the inverter and breaker panel.
3. Is it better to wire solar panels in series or parallel?
Series wiring increases voltage but keeps current constant, making it ideal for long cable runs. Parallel wiring keeps voltage stable but increases current, giving better shading performance.
4. How do I find the positive and negative on a solar panel?
Look for polarity markings near the junction box or use a voltmeter to confirm. A positive reading shows correct polarity, while a negative reading means the leads are reversed.
5. What happens if you wire a solar panel backwards?
Reversed polarity won’t damage the panel but blocks current flow, so no power is generated. Most systems use diodes or controllers to prevent harm until the wiring is corrected.
6. What are the electrical requirements for solar panels?
Use copper conductors rated for sunlight, proper MC4 connectors, grounding, and overcurrent protection. Always follow NEC standards and refer to a solar panel wiring diagram for accuracy.
.png)
Understanding solar panel wiring both in series, parallel, or hybrid, is key to building efficient systems. Learning how to wire solar panels properly and reading a solar panel wiring guide can help homeowners and installers to design safe and long-lasting solar setups.
To simplify the process, ARKA 360 offers advanced solar design software for professionals. From generating solar wiring diagrams to creating client-ready proposals, it streamlines every step of your project.

